If this editor looks unfamiliar, you're likely using the previous version.
Access the right documentation by clicking on the button.
The Customizable Lead Form feature allows you to capture high-quality prospect data by defining exactly which fields, visuals, and integrations your demo needs. Instead of a one-size-fits-all approach, you can now build a bespoke qualification flow that syncs directly with your sales tech stack.
This guide details the process for creating, customizing, and applying a new lead form to your demos.
Step 1:
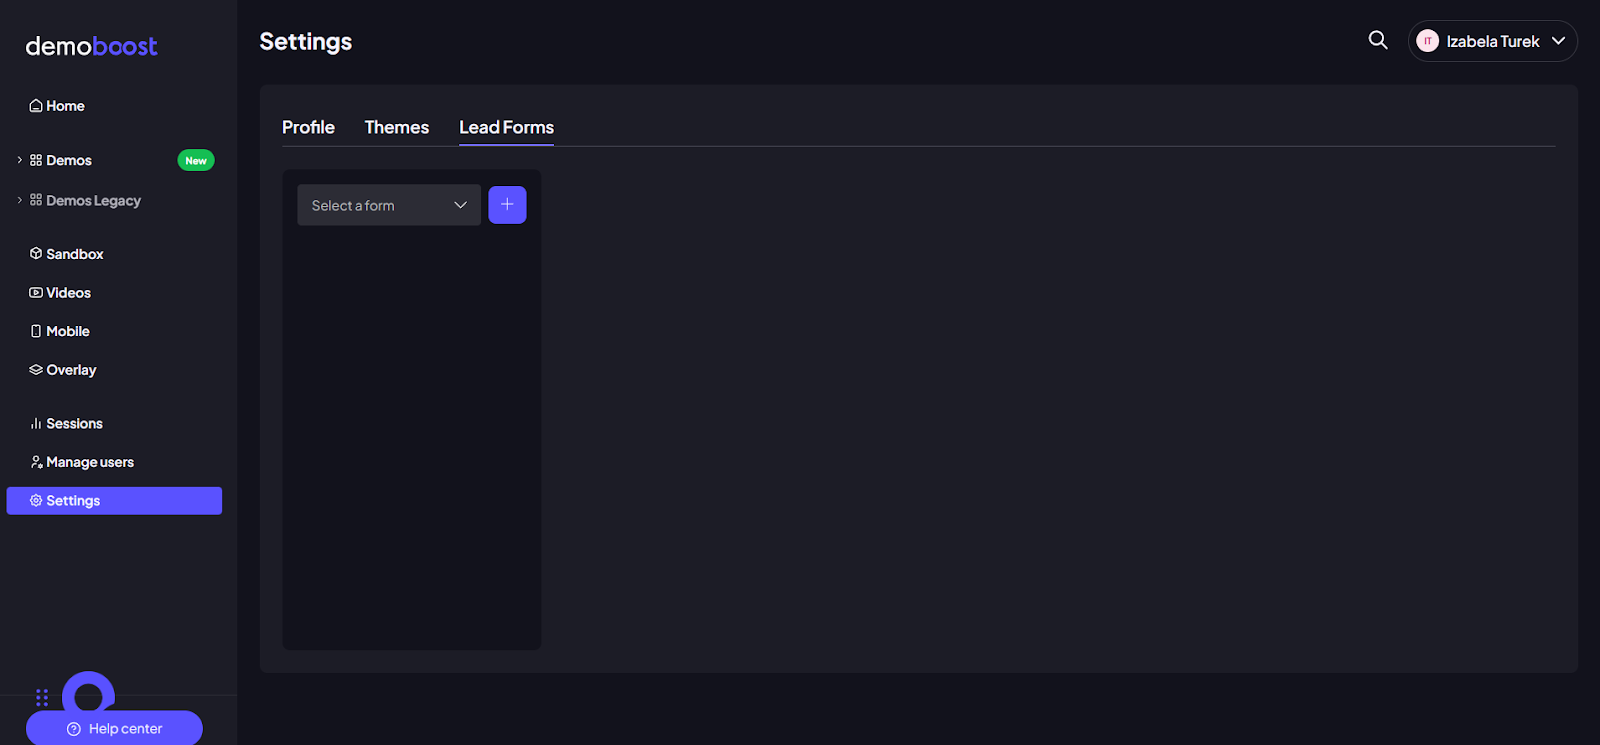
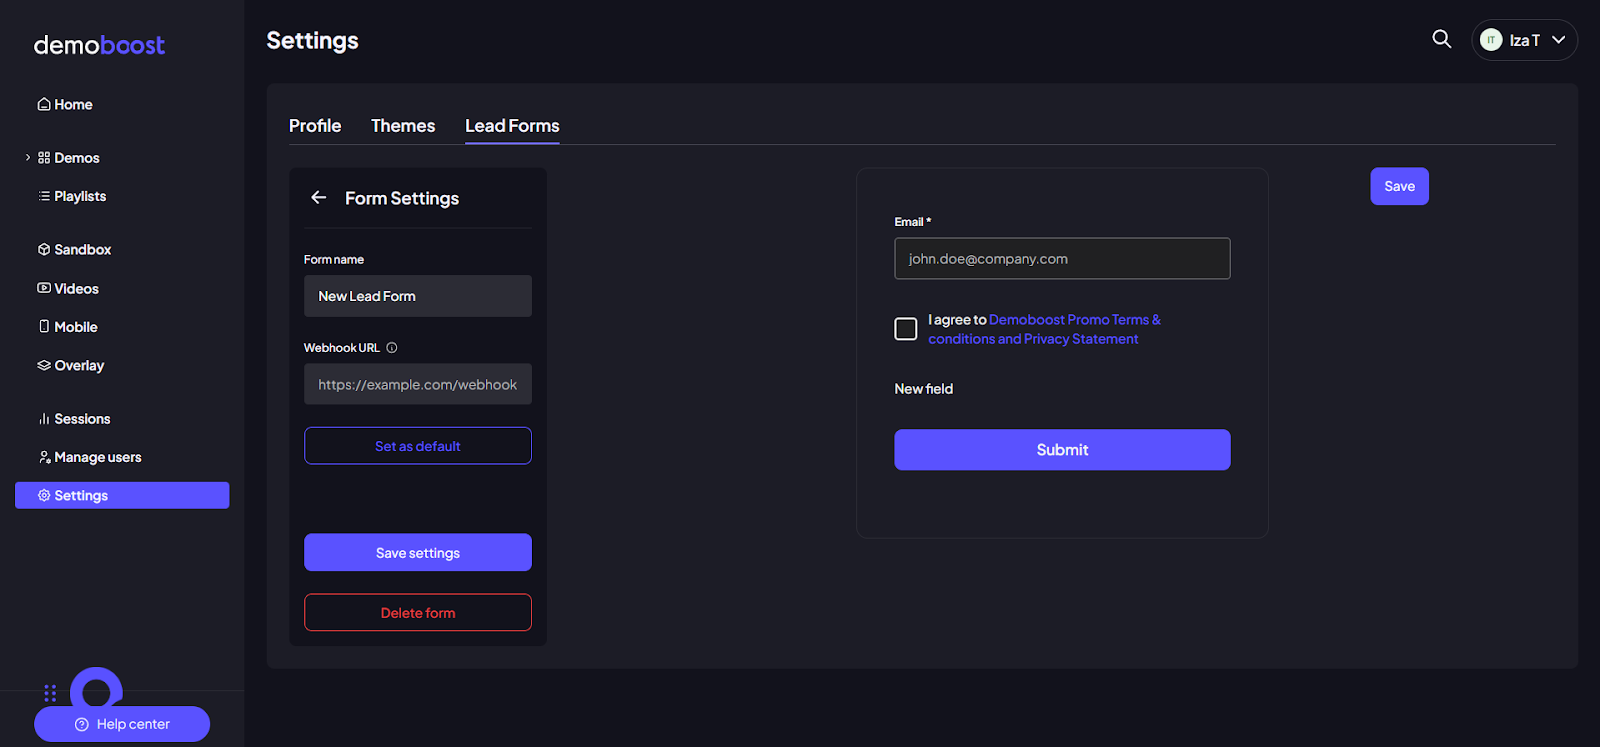
Navigate to Settings in the main sidebar and select the Lead Form tab.
Note: This area is typically reserved for users with Admin Org privileges.
Step 2:
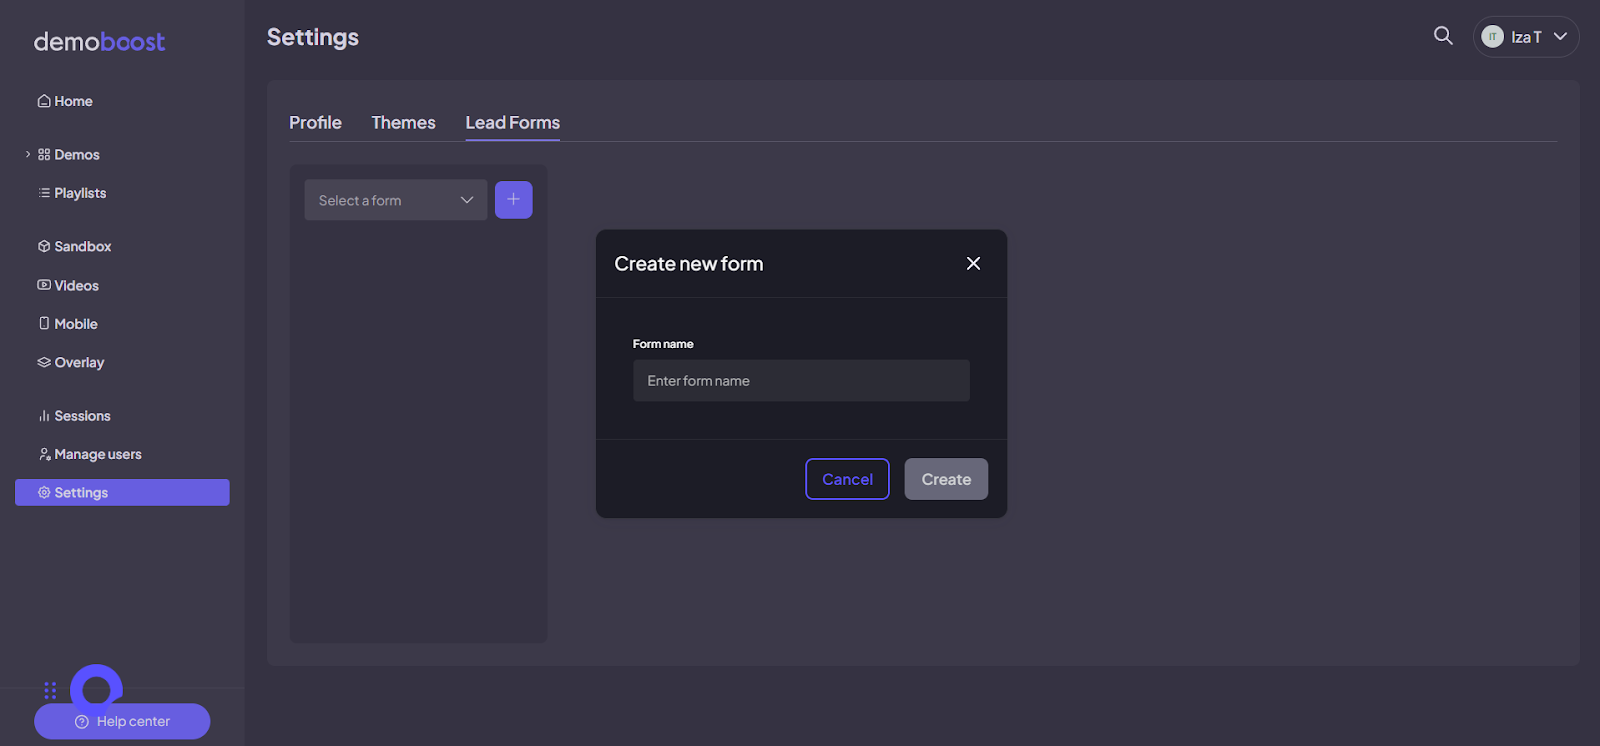
To start from scratch, click the "+" (plus) icon. This will open a fresh canvas for your new form.
Step 3:
Give your form a clear, internal name so you can easily identify it later in the demo settings.
Step 4:
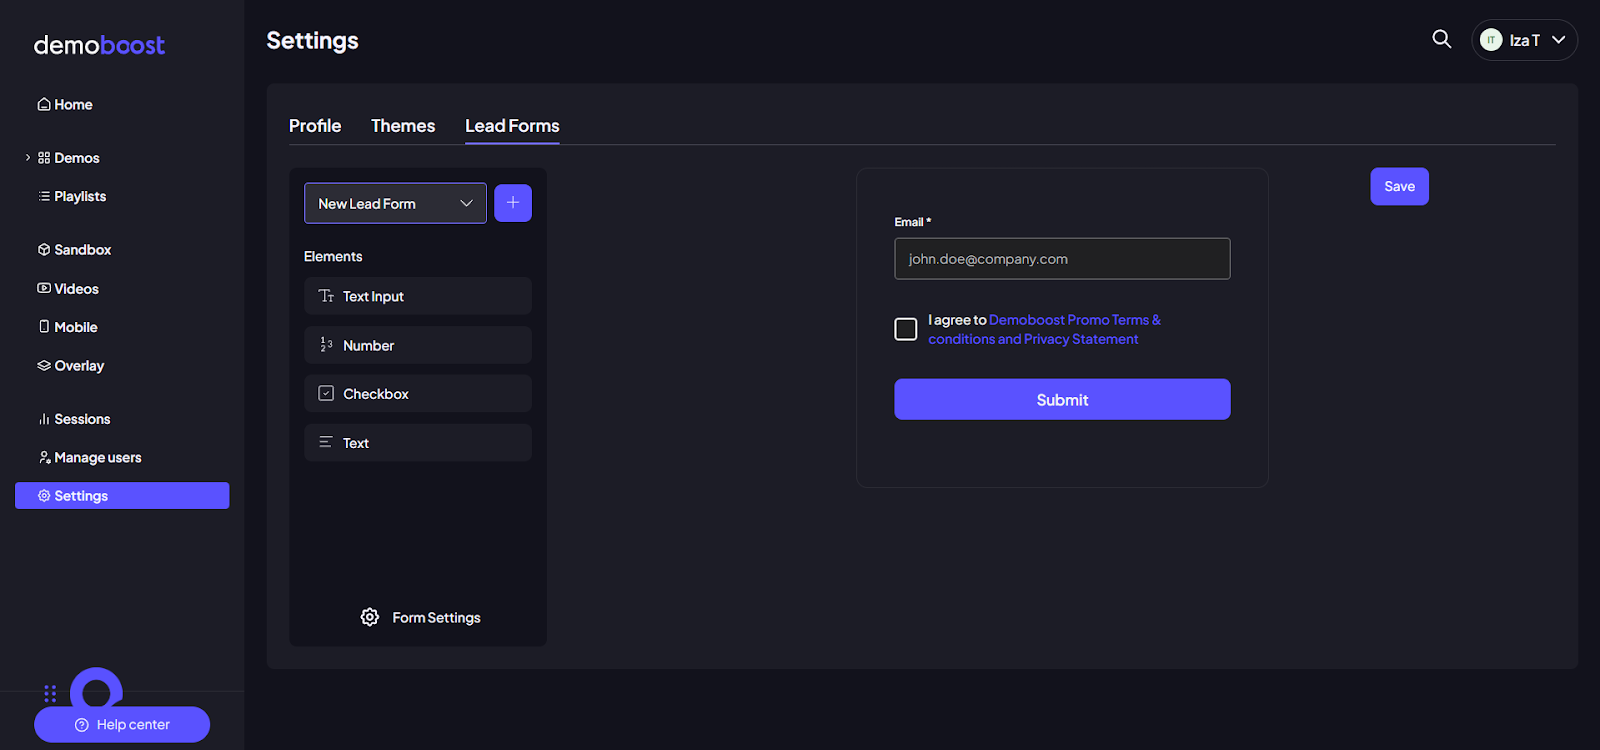
You can add elements to your form in two ways:
- Click: Simply click an element to add it to the bottom of the form.
- Drag-and-Drop: Grab an element and place it exactly where you want it to appear.
Step 5:
Choose your fields:
- Text Input: Perfect for names, job titles, or company names.
- Number: Ideal for quantitative data like company size or seat requirements.
- Checkbox: Use this for newsletter opt-ins or privacy policy agreements.
- Text: Add welcome notes, instructions, or even images.
Step 6:
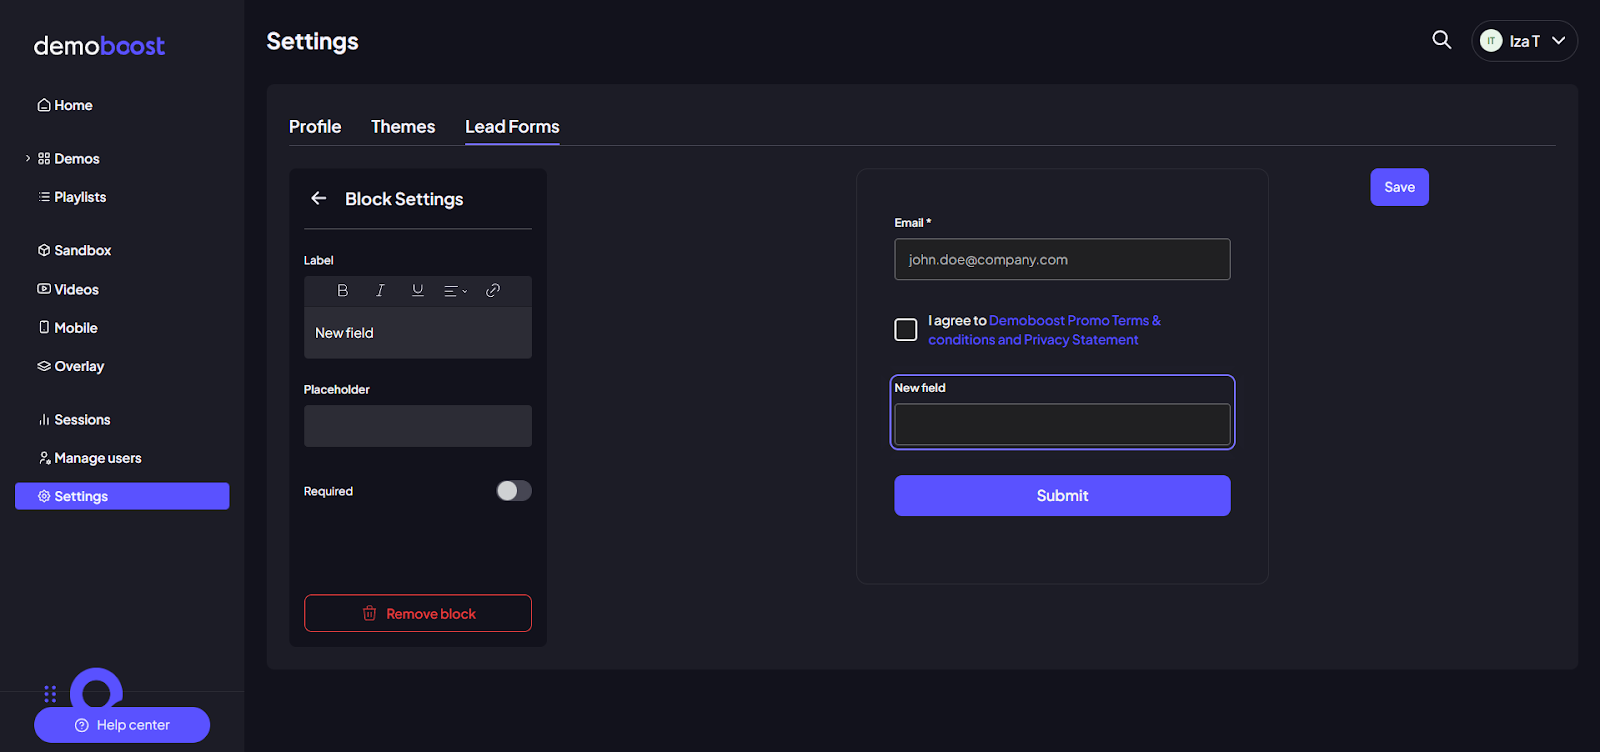
Click on any added field to open the Block Settings. Here, you can customize the Label (the question asked), add Placeholder Text (hints for the user), and toggle the Required switch to make the field mandatory.
Step 7:
To add an image (like your logo or a product hero shot), click the Text element.
Step 8:
Inside the text block settings, locate the Image icon in the formatting bar. Click it and simply paste the URL link to your image. Voila! Your picture appears instantly. You can leave it as a standalone visual or add supporting text below it.
Step 9:
Switch to the Form Settings tab to configure your data flow.
Step 10:
Set up the Webhook. Enter a Webhook URL to send lead data as a POST request the moment a viewer submits.
- For Sales Teams: This means leads are automatically created in your CRM, or existing leads are updated with a new activity log—no manual CSV exports required.
- For Efficiency: Trigger instant alerts in Slack or Microsoft Teams so your reps can follow up in real-time.
Step 11:
Click Save settings to lock in your configuration.
Step 12:
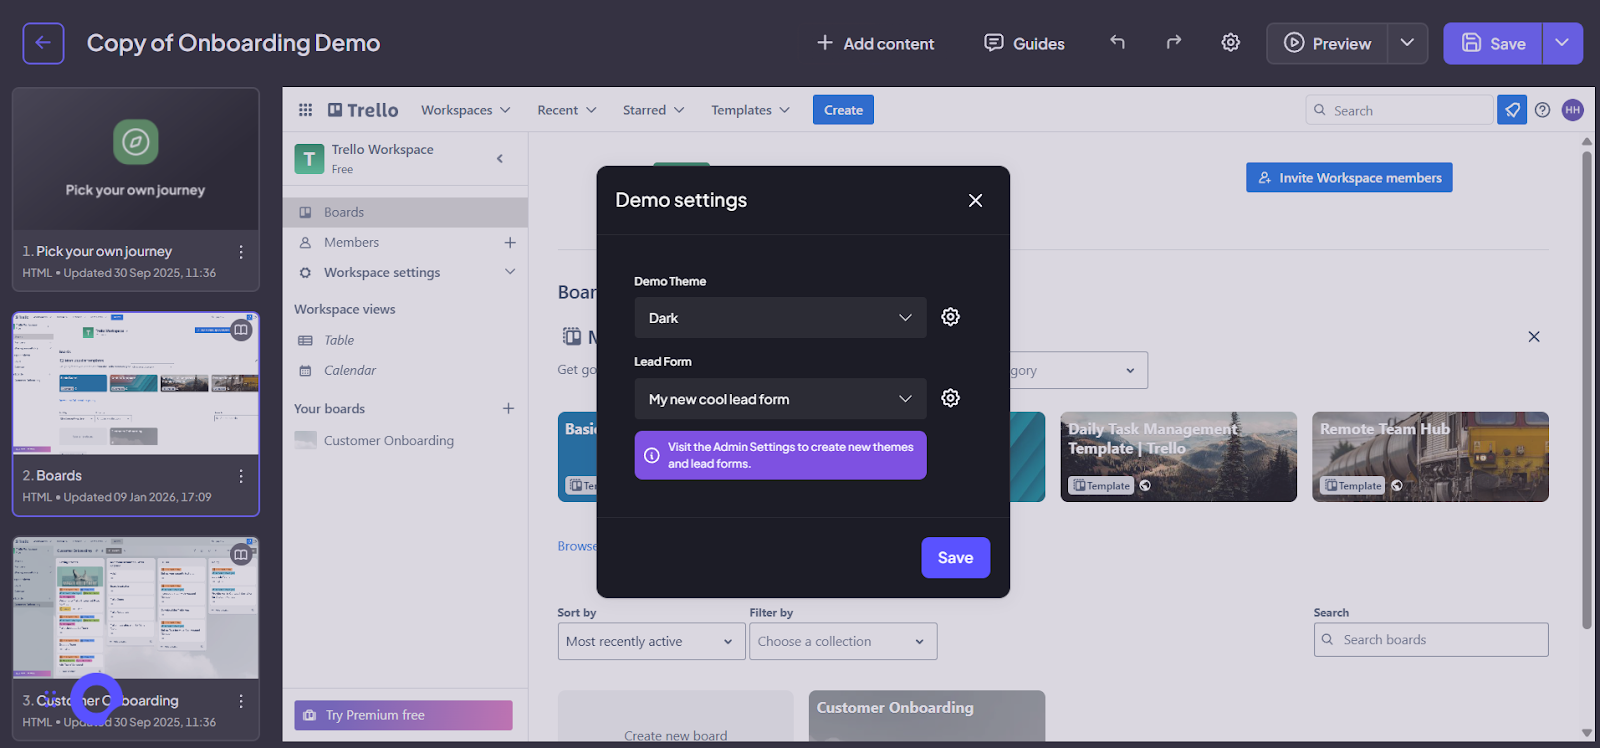
Open the Demo Editor for the specific project where you want the form to appear.
Step 13:
Click the Settings icon in the top panel of the editor.
Step 14:
In the dropdown menu, locate your newly created form and select it. This "gates" your demo with your custom-built qualification flow.
Step 15
Hit Save, and your demo is officially ready to start capturing data!