If this editor looks unfamiliar, you're likely using the previous version.
Access the right documentation by clicking on the button.
Wingman is Demoboost’s AI-powered demo building assistant that helps you personalize, update and adapt your interactive demos using natural language. Edit individual elements, transform the entire screen or apply the changes across multiple screens — all with a single prompt.
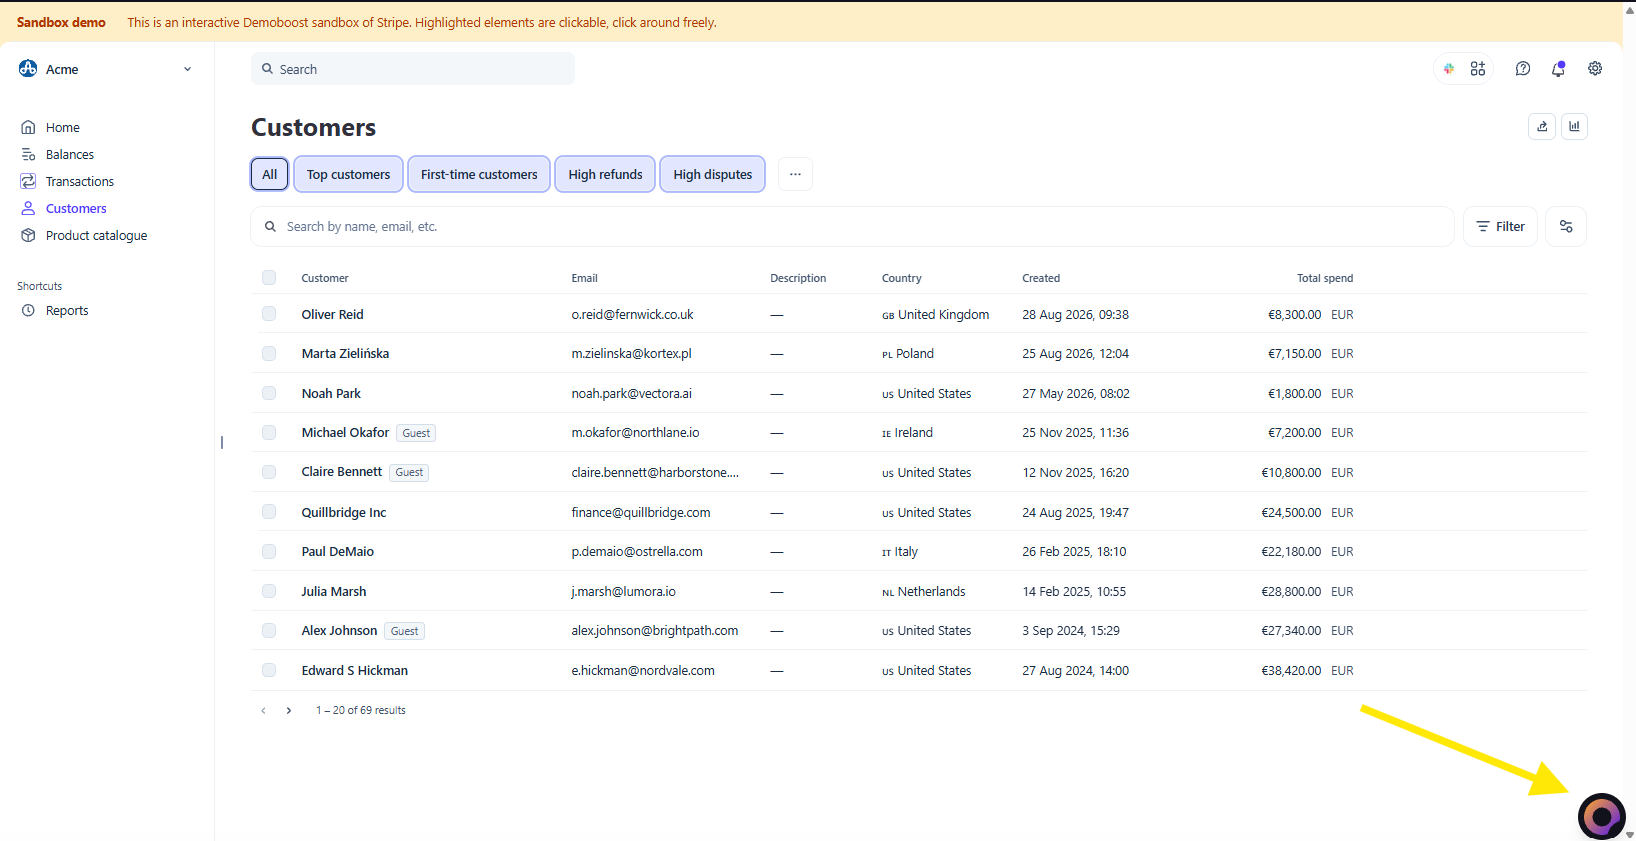
Step 1: Open Wingman
You'll find the Wingman widget in the bottom-right corner of the editor. Open the chat to start editing.
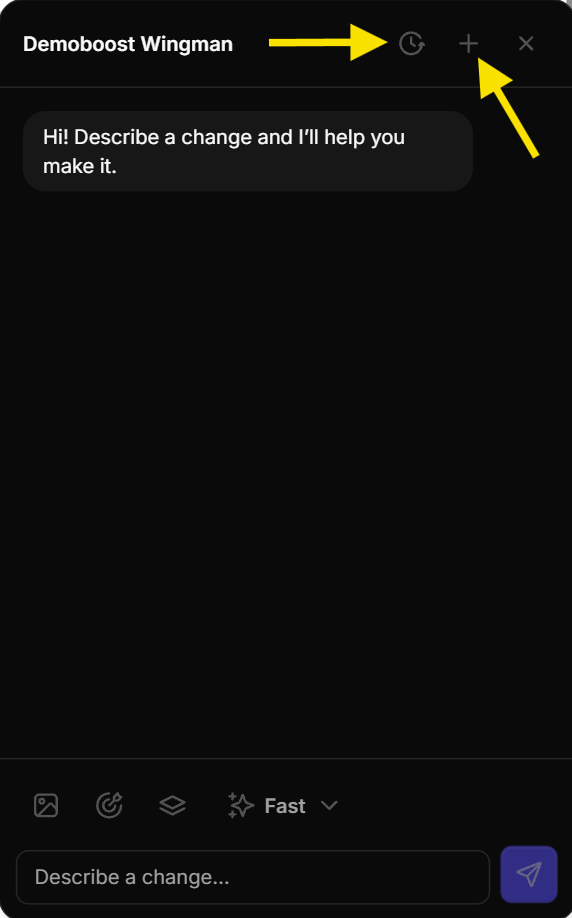
Step 2: Access Previous Conversations
Need to continue where you left off?
Open your Chat History to revisit previous conversations, continue editing from an earlier session or remove chats you no longer need.
Click the + button whenever you'd like to start fresh.
Creating a new conversation is a great way to keep different editing tasks organized while working on multiple demos or personalization requests.
Step 3: Choose Your AI Model
Before sending your request, select the AI model you’d like Wingman to use.
Different models use different amounts of AI credits and may be suited to different editing tasks. Organization admins can control which models are available to their teams.
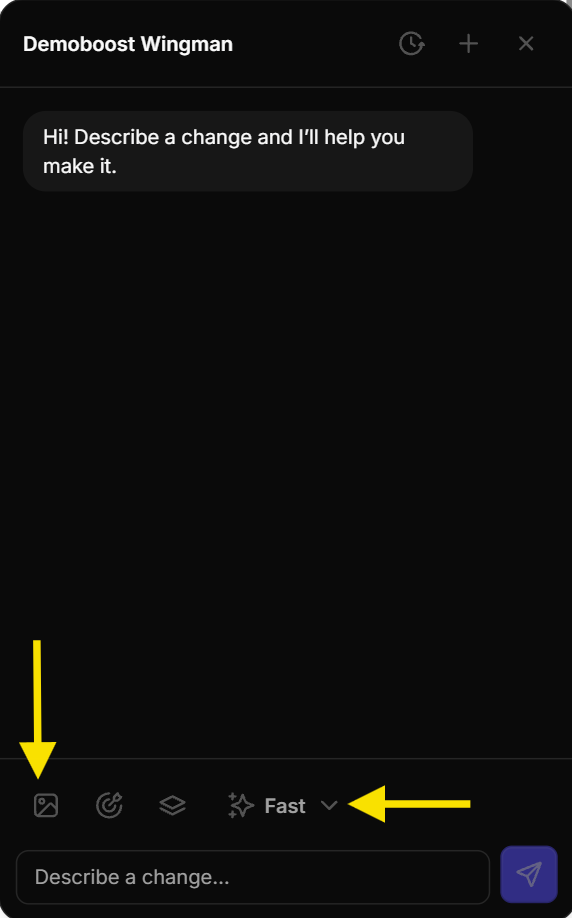
Step 4: Provide Visual Context
You can upload an image to use as a reference or ask Wingman to place it directly on your screen.
This is a quick way to update logos, charts or any other visual assets while giving Wingman additional context for your request.
Step 5: Choose What to Edit
Wingman can edit a single screen or work across multiple screens at once. When writing your prompt, specify which screens you want Wingman to update, or select them using the screen-selection button in the chat menu.
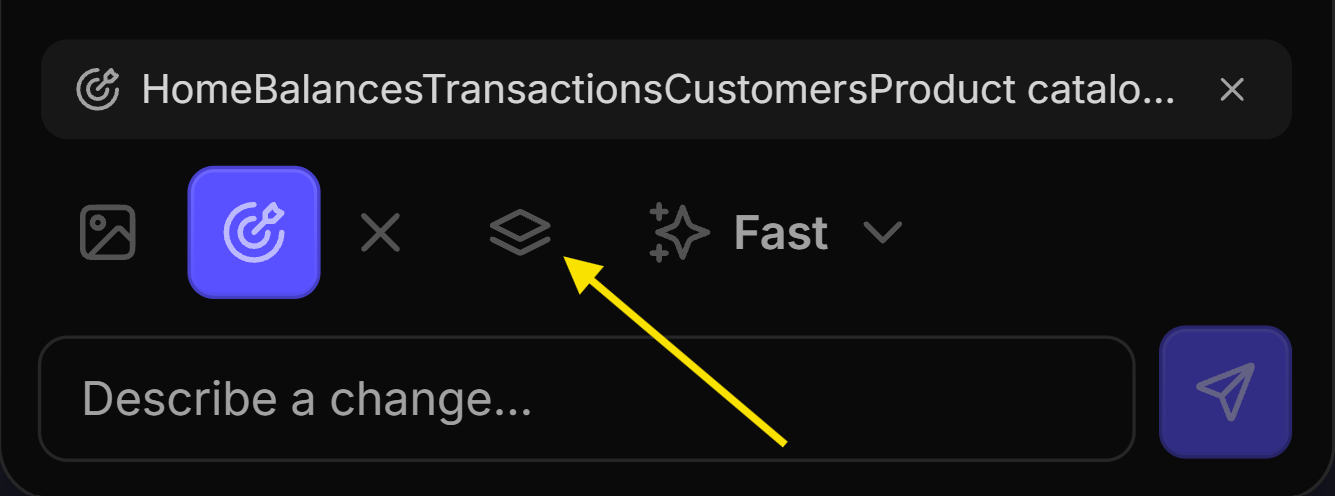
For more targeted edits, enable Target Mode and select the element or elements you want to update. A description of the selected elements will appear above the chat menu.
Alternatively, select an element first and click Edit with AI. Wingman will automatically open in Target Mode with that element selected.
Step 6: Review the Changes
Once you submit your request, Wingman analyzes the selected screen\s and applies the requested changes.
Review the result using the Wingman widget. Click the eye icon to compare the updated version with the original screen.
You can review each screen individually before deciding whether to keep or discard the changes.
Step 7: Apply Changes Per Screen or All at Once
You’re in control of how the changes are applied.
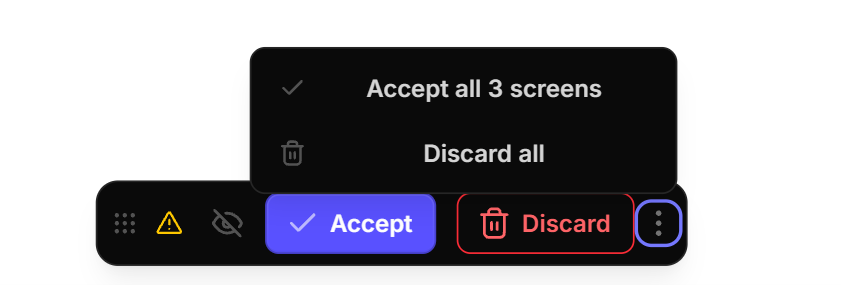
For each screen, you can click Accept or Discard to keep or remove the changes individually.
Happy with everything across the selected screens? Open the three-dot menu and accept the changes for all screens at once.
This makes it easy to review AI-generated updates while keeping full control over what goes into your final demo.
And that’s it! Your demo is updated and ready to use.
Looking for more inspiration? Check out our Playbook to discover additional editing use cases, example prompts and best practices.