If this editor looks unfamiliar, you're likely using the previous version.
Access the right documentation by clicking on the button.
Demoboost's Lead Analytics helps you understand how prospects interact with your demos, identify high-intent buyers, and prioritize follow-ups based on real engagement data.
In this article, you'll learn how to access Lead Analytics, explore individual engagement journeys, understand lead scoring, filter and export lead data, and analyze engagement across accounts.
Step 1: Access Lead Analytics
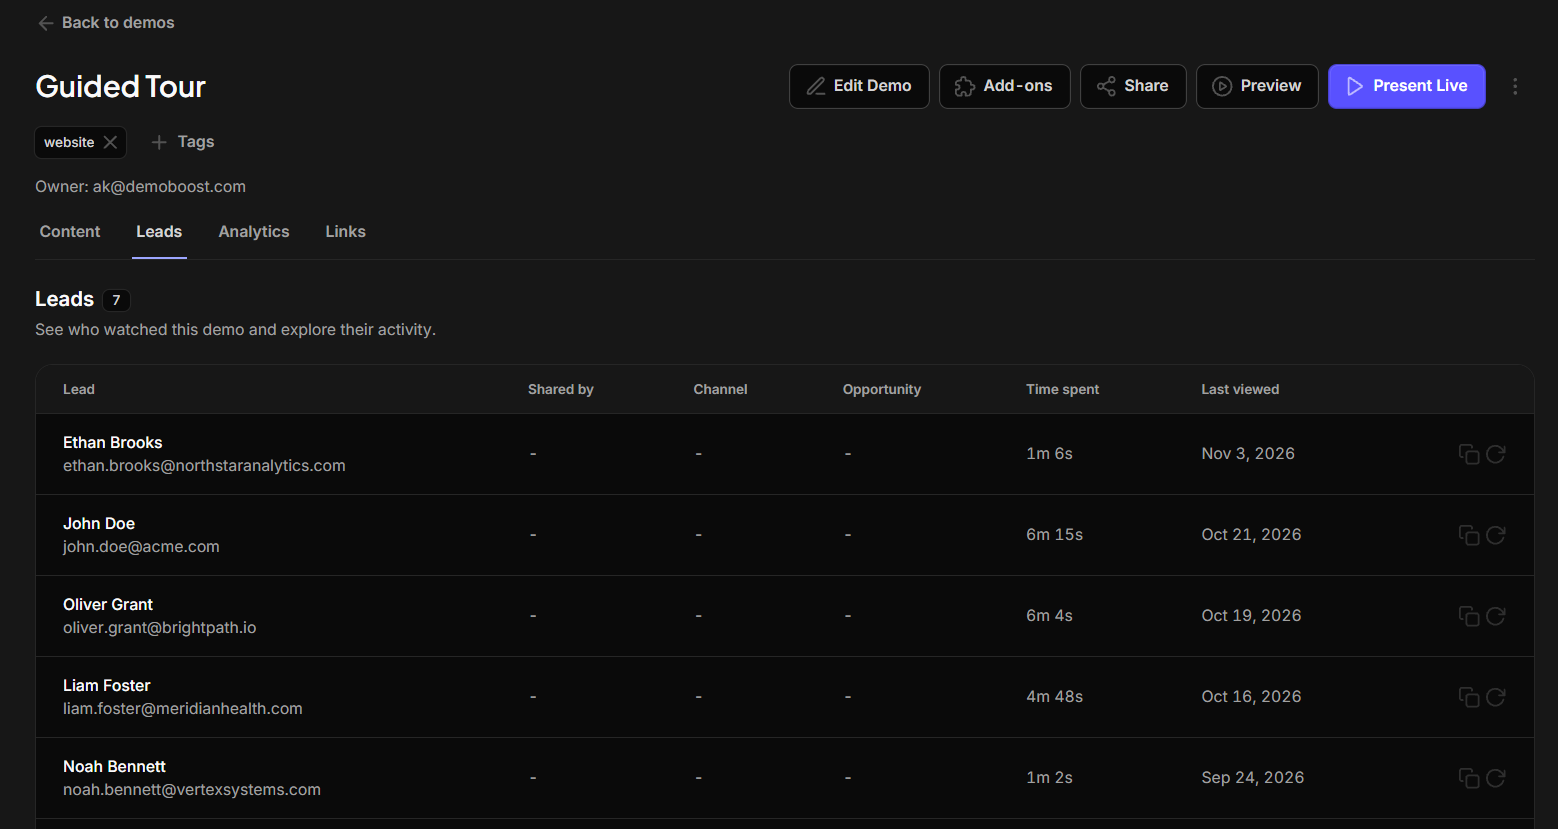
Once you've shared your demos and prospects start engaging with them, navigate to the Leads tab in Demoboost.
Here, you'll find prospects who have identified themselves through:
- Lead Forms: Viewers who submit their information when accessing a demo.
- Identified Sharing Links: Viewers identified through personalized or verified sharing links.
Anonymous visitors are not added to your lead list.
Select any lead to open their profile and explore their engagement history.
Step 2: Explore Individual Lead Engagement
Each lead has a dedicated analytics page that brings together their activity across your demos.
Here, you can review:
- Lead Score: An overall score reflecting the lead's activity and interest.
- Activity History: A timeline of visits and interactions.
- Lead Profile: Contact information and identification details.
- Viewed Demos: All demos the lead has accessed through sharing links.
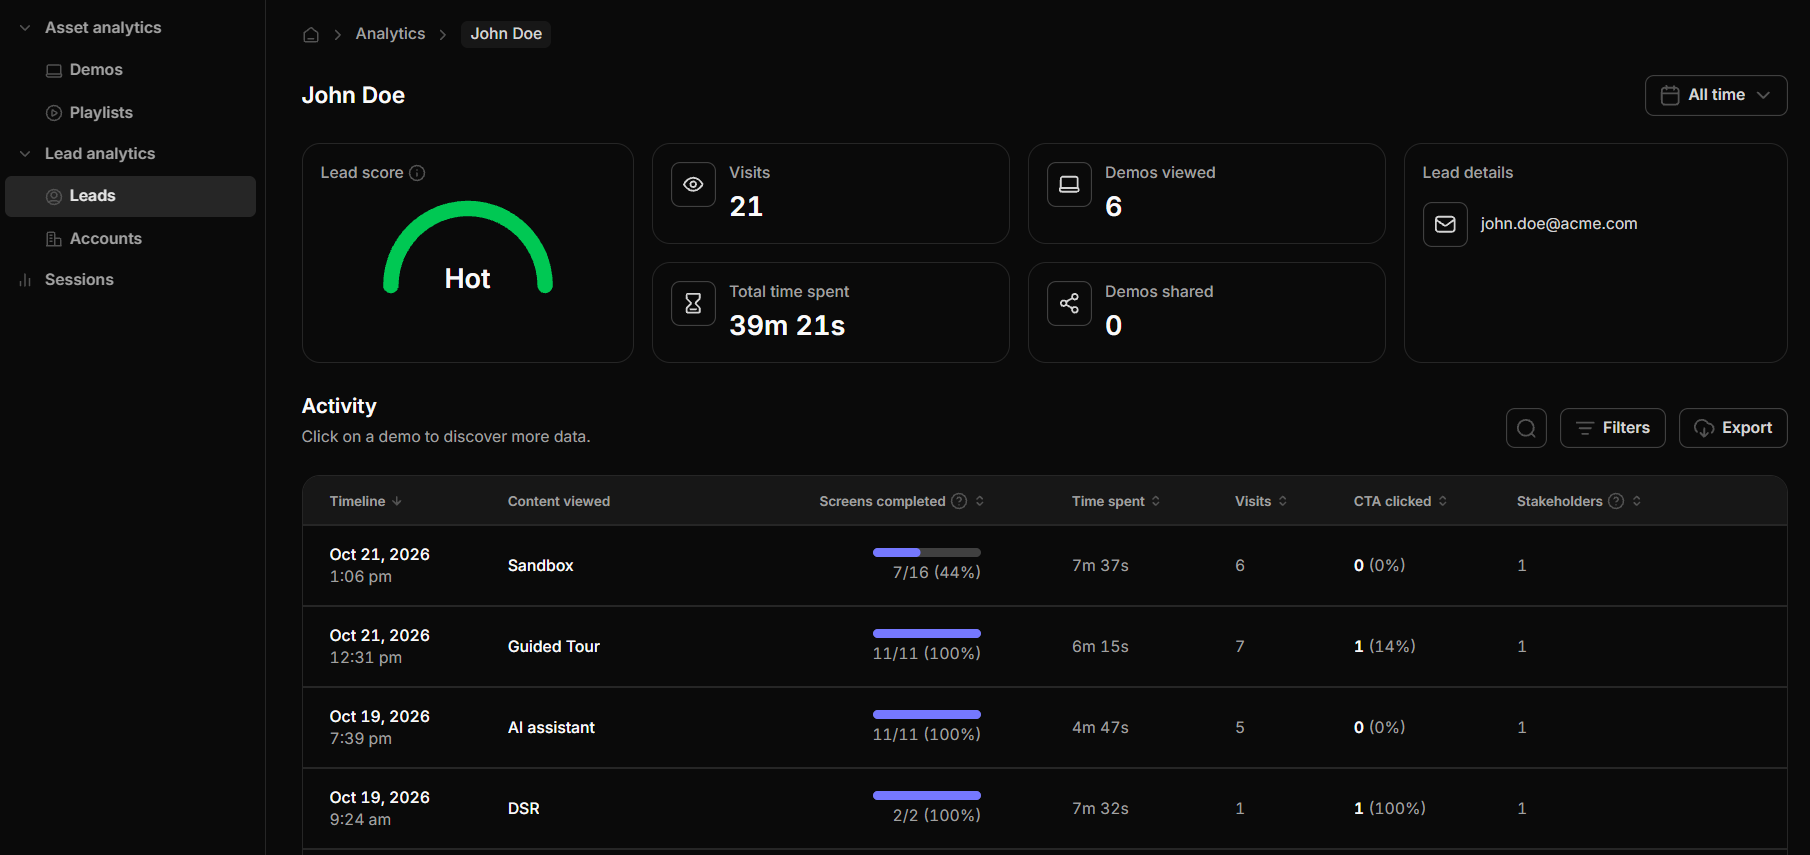
This overview helps you quickly understand how actively a prospect has engaged with your content.
How Lead Scoring Works
Demoboost calculates each lead's score based on their activity across all demo visits. Each interaction earns points:
Based on their total score, leads are categorized as:
Cold: Below 15 points
Warm: 15–49.9 points
Hot: 50 points and above
Score decay: Points earned during each visit are halved every 7 days since that visit's last activity. The lead's total score is the sum of all visit scores after decay.
Step 3: Explore Detailed Demo Engagement
From the lead's activity history, select a viewed demo to open its Overview section.
Here, you can review time spent, CTA clicks, shares, drop-off points, and behavior-based insights and recommendations.
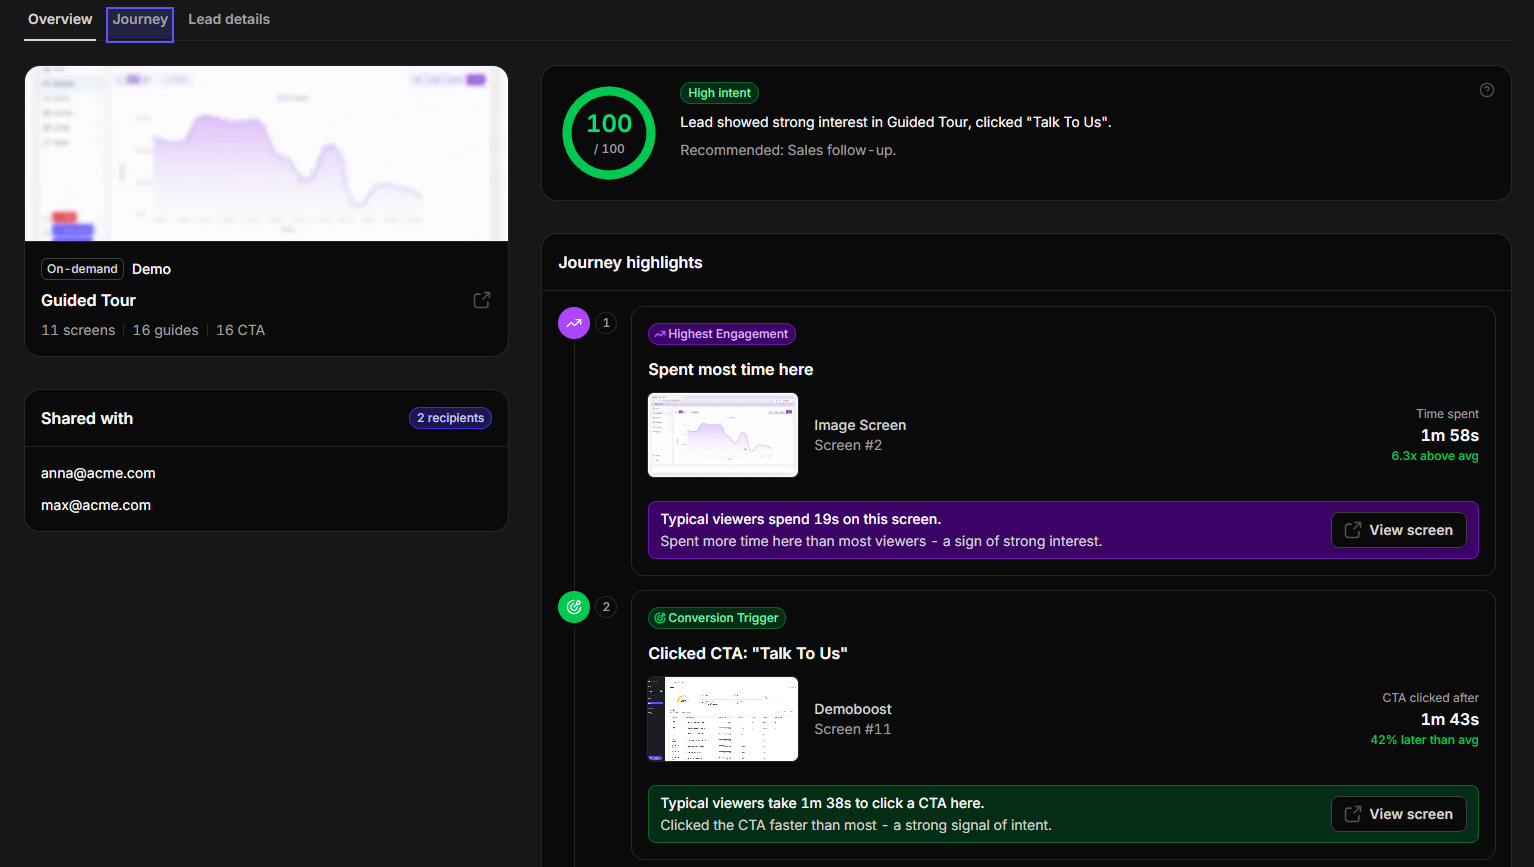
The Overview also highlights key moments in the viewer's journey:
- Highest Engagement: The screen where the viewer spent the most time.
- Conversion Trigger: The screen where a CTA was clicked.
- Viral Screen: The most frequently shared screen.
- Exit Point: The screen where the viewer left without completing the demo.
These insights help you understand what captured the viewer's interest and where they may have disengaged.
Note: Live sessions appear as separate Live rows in the activity history.
Step 4: Analyze the Screen-by-Screen Journey
Open the Journey tab to see exactly how the lead navigated through your demo.
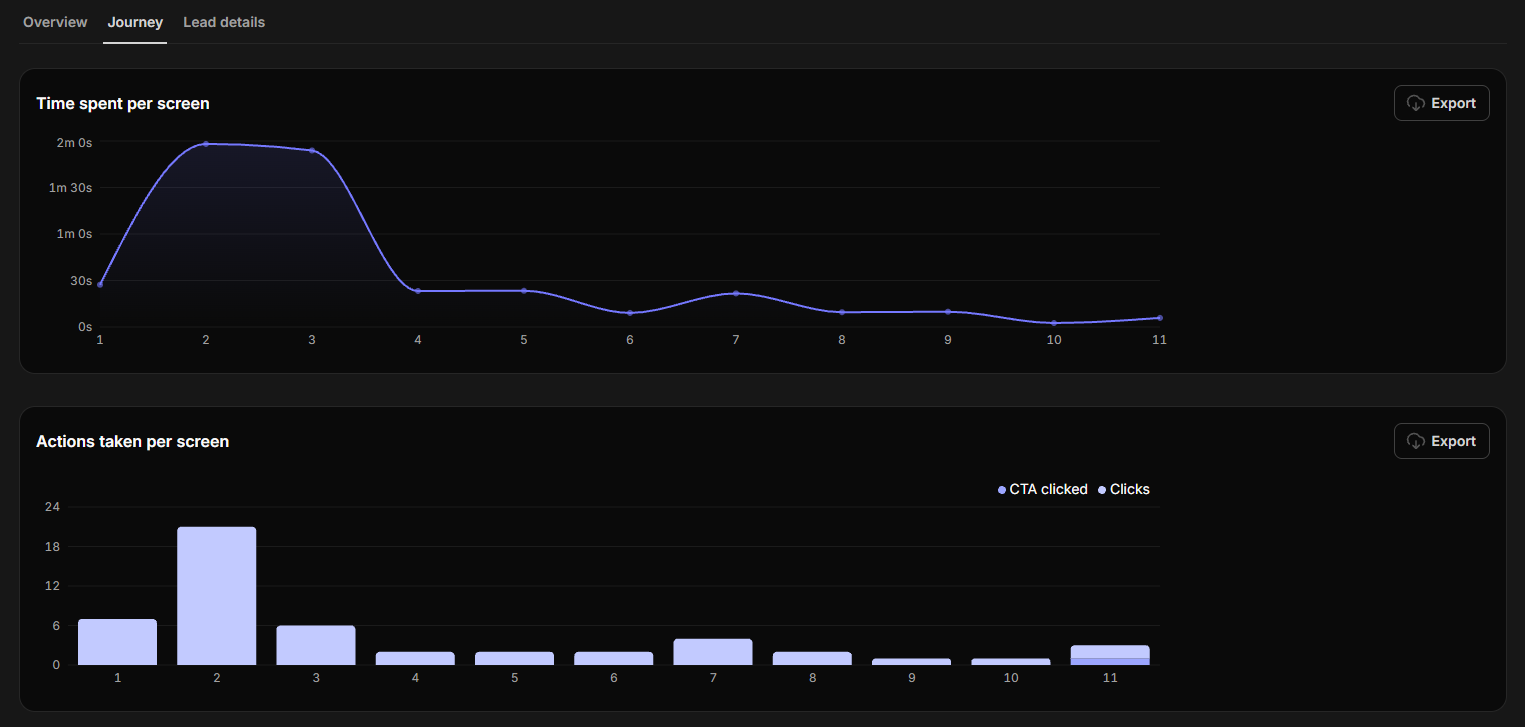
The journey visualization shows the sequence of screens visited and the active time spent on each screen.
Hover over a screen to see additional details, including:
- Active time spent
- Number of clicks
- CTA interactions
- Number of guides
Use these insights to identify which product areas captured your prospect's attention and where they may need additional guidance.
Step 5: Review Lead Details and Attribution
Navigate to the Lead Details tab to access additional information about the viewer and their session.
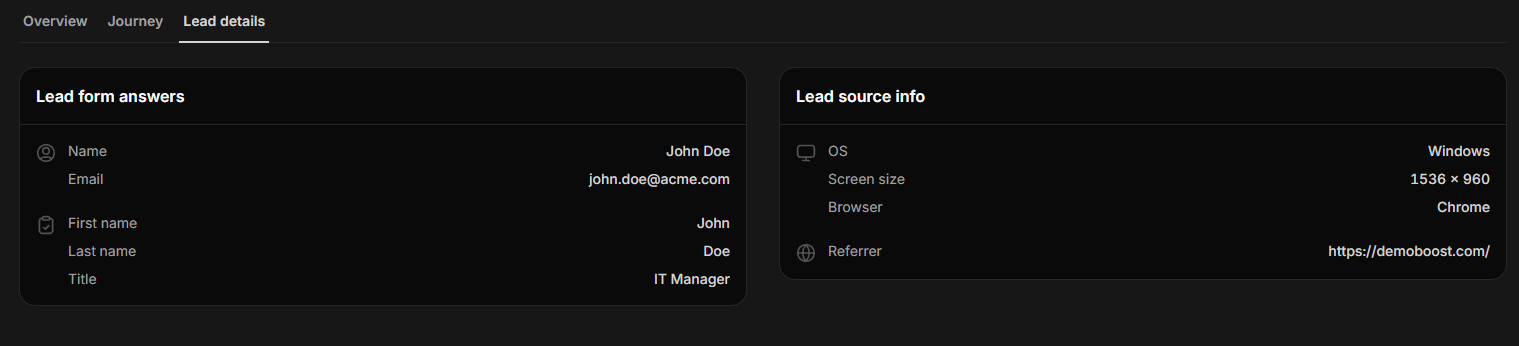
Depending on the available data, you'll find:
- Lead Form Responses: Information submitted by the viewer.
- Device Information: Browser, operating system, and screen size.
- Traffic Attribution: UTM source, medium, campaign, and content.
- Referrer: The source that directed the viewer to the demo.
- Playlist Priorities: Selected interests or priorities, when applicable.
- Live Notes: Notes captured during live sessions, when applicable.
This information helps you connect demo engagement with your marketing campaigns, lead sources, and sales conversations.
Step 6: View and Manage Your Lead List
Return to the Leads tab to access the complete list of identified prospects.
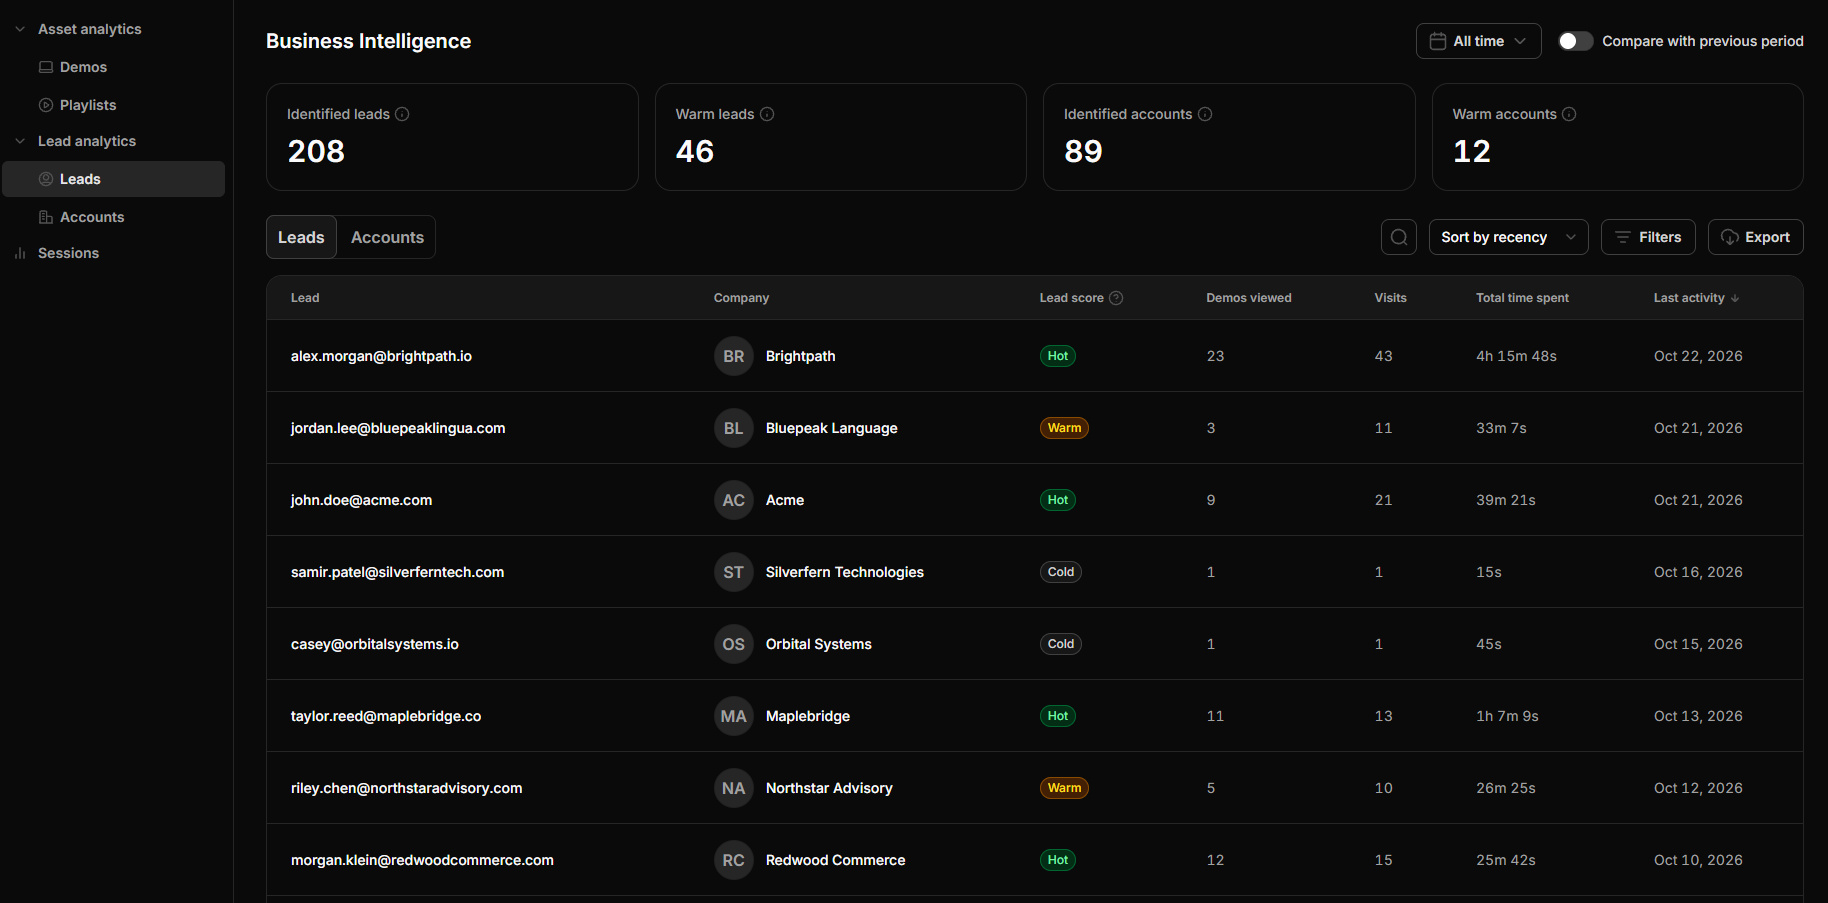
At the top of the page, you'll find an overview of total leads and accounts for the selected period.
You can:
- Select a Timeframe: Choose the period you want to analyze.
- Compare Periods: Track changes in lead generation and account activity over time.
- Sort Leads: Organize the list by recent activity, engagement score, number of visits, demos viewed, or total time spent.
- Filter by Engagement Score: Focus on prospects with the strongest engagement.
- Exclude Internal Leads: Remove internal activity from your analysis.
- Export Data: Download your lead list as a CSV file for further reporting or analysis.
These options help you identify your most engaged prospects and prioritize follow-ups.
Step 7: Analyze Engagement at Account Level
Switch to Account Analytics to understand how companies engage with your demos.
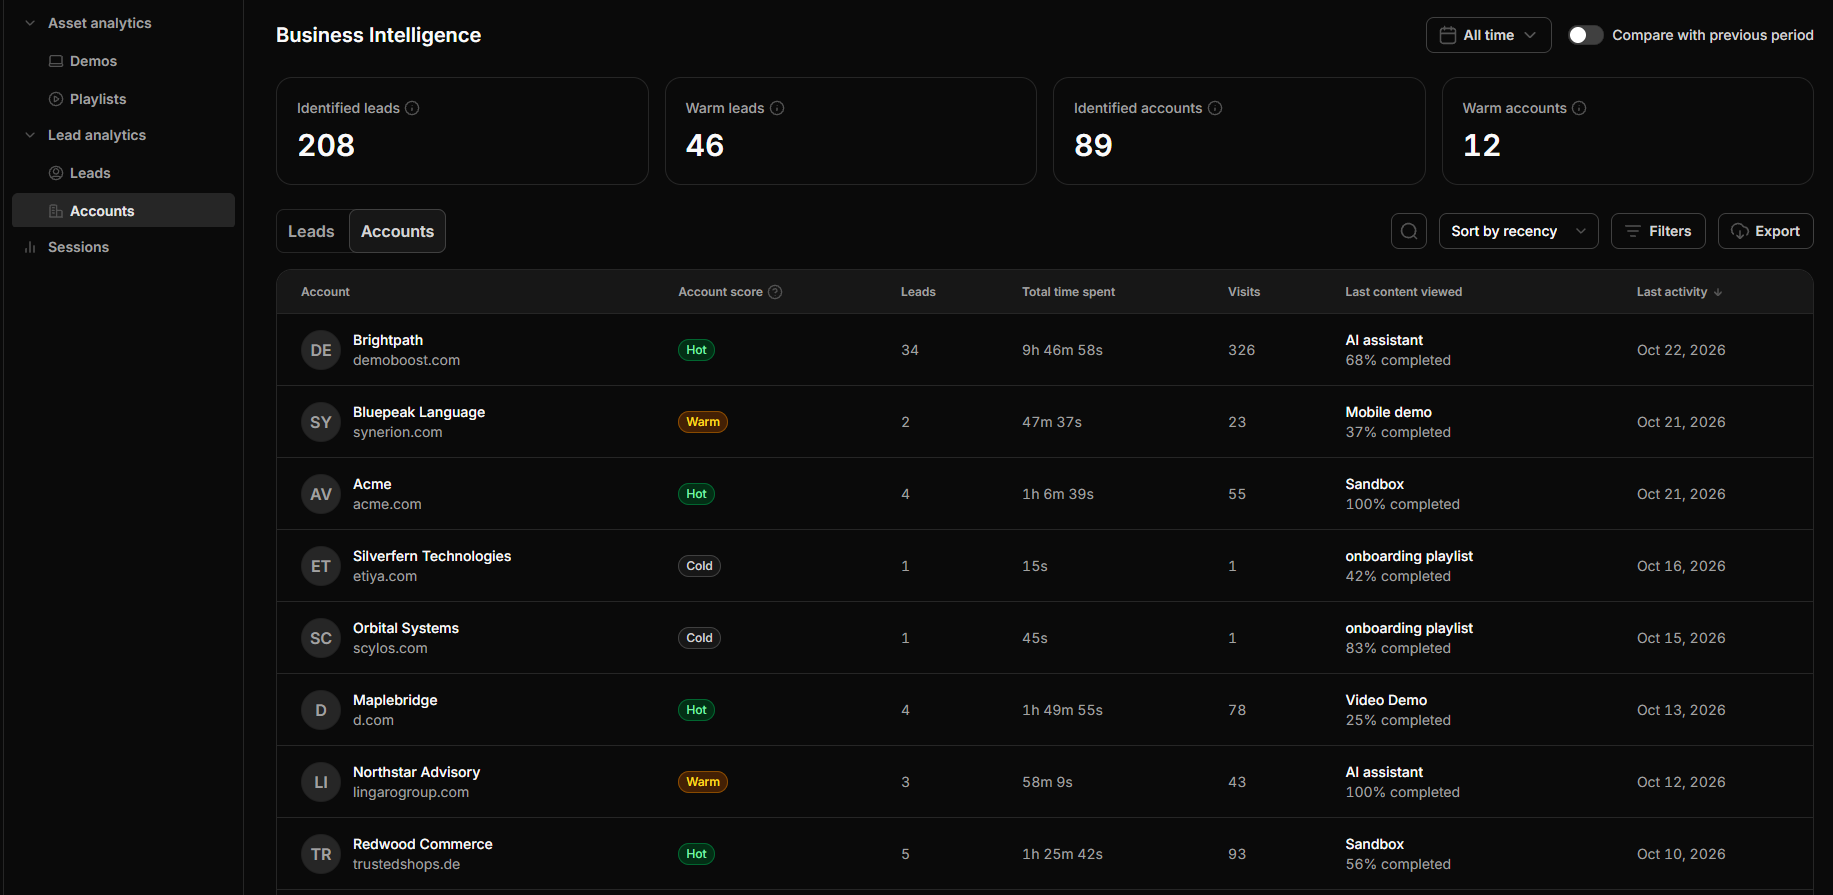
Instead of analyzing individual prospects only, you can evaluate engagement at the organization level.
How Account Scoring Works
An account's engagement score is based on the highest-scoring lead associated with that company.
This helps you identify accounts with highly engaged stakeholders and prioritize outreach based on actual buyer activity.
With Account Analytics, you can:
- Identify companies demonstrating strong buyer interest.
- Spot engagement across multiple stakeholders.
- Prioritize outreach based on engagement activity.
Turn Demo Engagement into Actionable Insights
With Demoboost Lead and Account Analytics, you can go beyond basic view counts to understand how prospects interact with your content.
Use these insights to identify high-intent buyers, personalize follow-ups, and turn demo engagement into more meaningful sales conversations.